Fourth Tutorial: The Third Dimension.
The Third Dimension.
The tutorial explains how to use three dimensions in processing, and also how to take some of the example code used in previous tutorials into 3D. It also explains how to use libraries in Processing, and it includes a library specifically developed for this course, in order to render and also 3D print voxel data.
Drawing in 3D.
There is no big difference between drawing in 2D and drawing in 3D in Processing, except the addition of the 3rd dimension, and the more intensive use of transformations in order to draw. To enable using most 3D commands it is necessary to specify a P3D (the 3D graphics renderer) through the size() command. Also, while drawing in 3D is common to use transformations, rather than give world coordinates directly. Transformations are also useful for drawing in 2D, but we will look at their specific use in 3D. The principle is quite similar to that of local coordinate systems and global or world coordinate systems in CAD or modelling packages: through the use of translate(), rotate() or scale(), for example (and their variations such as rotateX(), rotateY(), rotateZ()) it is possible to modify the current drawing coordinate system. After calls to these functions, everything will be drawn rotated, translated or scaled accordingly. resetMatrix() can be used to restore the initial, world coordinate system. pushMatrix() and popMatrix() can be used to store and restore transformations along the way, without the need to reset them fully. For storing transformations Processing (and many other graphic libraries) use transformation matrices. It is not necessary however to know the algebraic principles behind transformations to use them. The different functions dealing with transformations in Processing can be found under the Transform heading on the Processing language reference. As with 2D, the origin of the coordinate system is placed at the top-left corner of the window, the positive X axis to the right, and the positive Y axis pointing down. The positive Z axis is pointing towards the the viewer. One can think of the default system as a top view, Here is an example of drawing in 3D and some translations:
size(250,200,P3D); //tells processing to use 3D, besides specifying the size.
pixelDensity(displayDensity());
background(255);

strokeWeight(0.5);

translate (75,100,0); //make the first translation, to point 75,100,0
//draw a box centred on 0,0,0, 50 units wide, 20 units long, 30 units tall.
//Since the coordinate system is now translated, it will be drawn in
//75,100,0...
fill(255,0,0);
box(50,20,30);

translate (50,0,0); //translate the coordinate system 50 on X
//and draw another box
fill(20,20,255);
box(10,50,50);

translate (0,40,0); //translate the coordinate system 40 on Y
fill(255,255,0);
box(50,10,40);

translate (40,-60,-40);//translate again
rotateZ(PI/6.0); //and rotate around (current) Z axis 30 degrees (PI/6)
fill(20,20,20);
box(10,100,10);
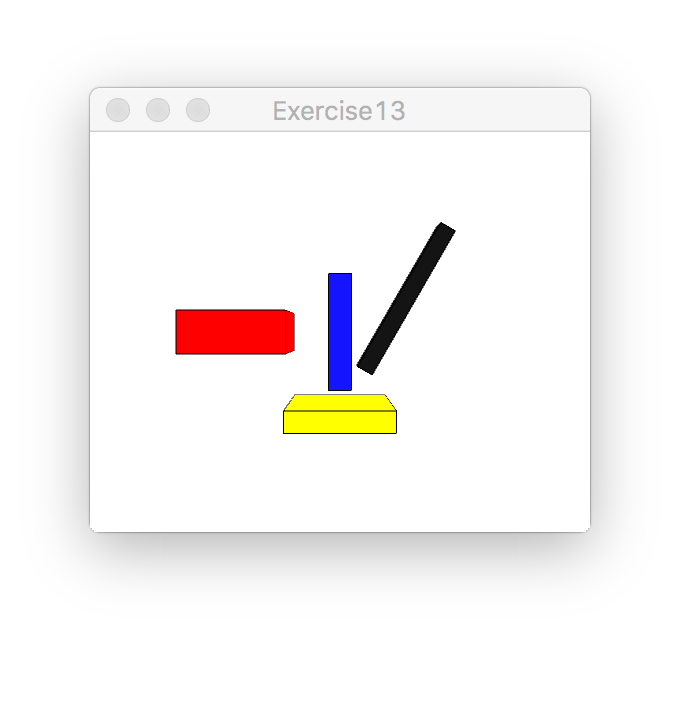
And this is the result:
It is easy to see the usefulness of resetMatrix(), pushMatrix() and popMatrix() , instead of having to mentally remember the accumulation of translations. for example one could easily write a small function to draw boxes in different places like this:
void setup(){
 size(500,500,P3D); //this tells processing that the sketch will use 3D, besides specifying the size.
 pixelDensity(displayDensity());
 background(255);
 strokeWeight(0.5);

 translate(250,250,0); //centre on the screen

 fill(100);//grey boxes

 for(int i=0;i<400;i++){
 drawBox(
 random(-200,200),
 random(-200,200),
 random(-200,200),
 random(-PI,PI),
 10,20,30);
 }

}

void drawBox(float x,float y, float z, float zrot, float w, float l, float h){
 pushMatrix(); //this stores the previous state of the transformation matrix.
 translate (x,y,z);//translate again
 rotateZ(zrot); //and rotate around (current) Z axis 30 degrees (PI/6)
 box(w,l,h);
 popMatrix();//this restores the matrix as it was in the previous push call.
}
An improvement to the code above would be to be able to rotate the view, perhaps even respond to the mouse to do so. This can be easily achieved through rotations in within the Processing draw() function (then we should draw everything at every frame, depending on a rotation angle) . However, since the code above made used of random generation, and doing this within the draw will mean that every time the position and rotation of the boxes would be different, it is necessary to generate the data once, store it, and then use it in draw. This is an easy modification that can be done using arrays to store the positions and rotations for each box. This is the code:
int numOfBoxes=400;
float[][] pos; //for storing random positions
float[] zRot; //for storing random rotations
//it would be possible to have another array for the the w,, and h of each box...

float rotAngle=0; //a variable used to stored the rotation of each frame

void setup(){
 size(500,500,P3D);
 pixelDensity(displayDensity());
 strokeWeight(0.5);

 //create the arrays
 pos=new float[numOfBoxes][3]; //3 values, for x,y,z
 zRot=new float[numOfBoxes];

 //fill the positions and rotation with random values
 for(int i=0;i<numOfBoxes;i++){
   pos[i][0]=random(-200,200); //as x
   pos[i][1]=random(-200,200); //as y
   pos[i][2]=random(-200,200); //as z
   zRot[i]=random(-PI,PI);
 }
}

void draw(){
 background(255);
 lights(); //turn the lights on!
 translate(250,250,0); //center on the screen
 rotateY(rotAngle); //rotate rotAngle around Y axis
 rotAngle+=0.005;
 //rotateY(mouseX*0.01); //rotate rotAngle around Y axis

 fill(200);//grey boxes

 for(int i=0;i<numOfBoxes;i++){
   drawBox(pos[i][0],pos[i][1],pos[i][2],zRot[i],10,20,30);
 }
}

void drawBox(float x,float y, float z, float zrot, float w, float l, float h){
 pushMatrix(); //this stores the previous state of the transformation matrix.
 translate (x,y,z);//translate again
 rotateX(zrot); //and rotate around (current) Z axis 30 degrees (PI/6)
 box(w,l,h);
 popMatrix();//this restores the matrix as it was in the previous push call.
}
If the line
rotateY(rotAngle);
is changed to:
rotateY(mouseX*0.01);
the view will rotate around the Y axis according to the mouse x position. It is possible to do similar transformations for the Z axis in relation to the y position of the mouse, also. Observe also the lights() function, that produces a shaded view of the geometry. There are more light functions under the Lights heading in the Processing reference.
Libraries, 3D views and output.
It is perfectly possible to implement viewing transformations such as panning, or zooming oneself, but it is easier to use code that has already been developed and tested by some else instead. A general mechanism to add functionality in most programming languages is that of libraries. Libraries consist, depending of the language and context, of predefined functions, classes or variables that make certain services and behaviours available to programs, once properly included in the code and linked at compilation. Usually libraries are distributed under a legal license that specifies the conditions for incorporating them into any other code, as for example the Open Source LGPL license, under which most of Processing is released.
There are a number of different options to include libraries in Processing: some libraries come already pre-installed, such as dxf, net, pdf or serial, and we don’t need to do much with these, except, like with any other library, include them in our code. Some contributed libraries can be installed through the the Processing IDE, and some need to be installed manually. Rather than repeating things in this text, the best reference can be found in the processing webpage section for libraries.
3d Viewing.
PeasyCam, by Jonathan Feinberg is a library that implements viewing transformations. It is a contributed library that can be easily installed through the Processing IDE. For installing PeasyCam, go to the “Sketch” menu and navigate to:
“Sketch -> Import Library -> Add Library…”
And there either scroll or type PeasyCam on the search field. Select it and click the “Install” button. Now that it is installed, we can easily use it by writing on the top of our program:
import peasy.*;
Which is the standard way in java of importing a library. (Alternatively one can go “Sketch -> Import Library” and select it from there; the import statement will be automatically written into the sketch). to For actually using it in the program it is necessary to declare a PeasyCam object for the sketch (outside setup() and draw() so it exists for the whole application and it is visible from both) and then it can be initialised in setup(). The parameters passed are “this”, which refers to this sketch (it always needs to be “this”), and 100, that is the initial distance of the camera.
import peasy.*;
PeasyCam cam;

void setup(){
 size(500, 500, P3D);
 pixelDensity(displayDensity());
 cam = new PeasyCam(this, 100);
 noStroke();
}

void draw(){
 background(0);
 lights();//turn on the lights!
 rotateX(radians(45)); //this is only so the lights look good
 rotateY(radians(30));
 box(45);
}
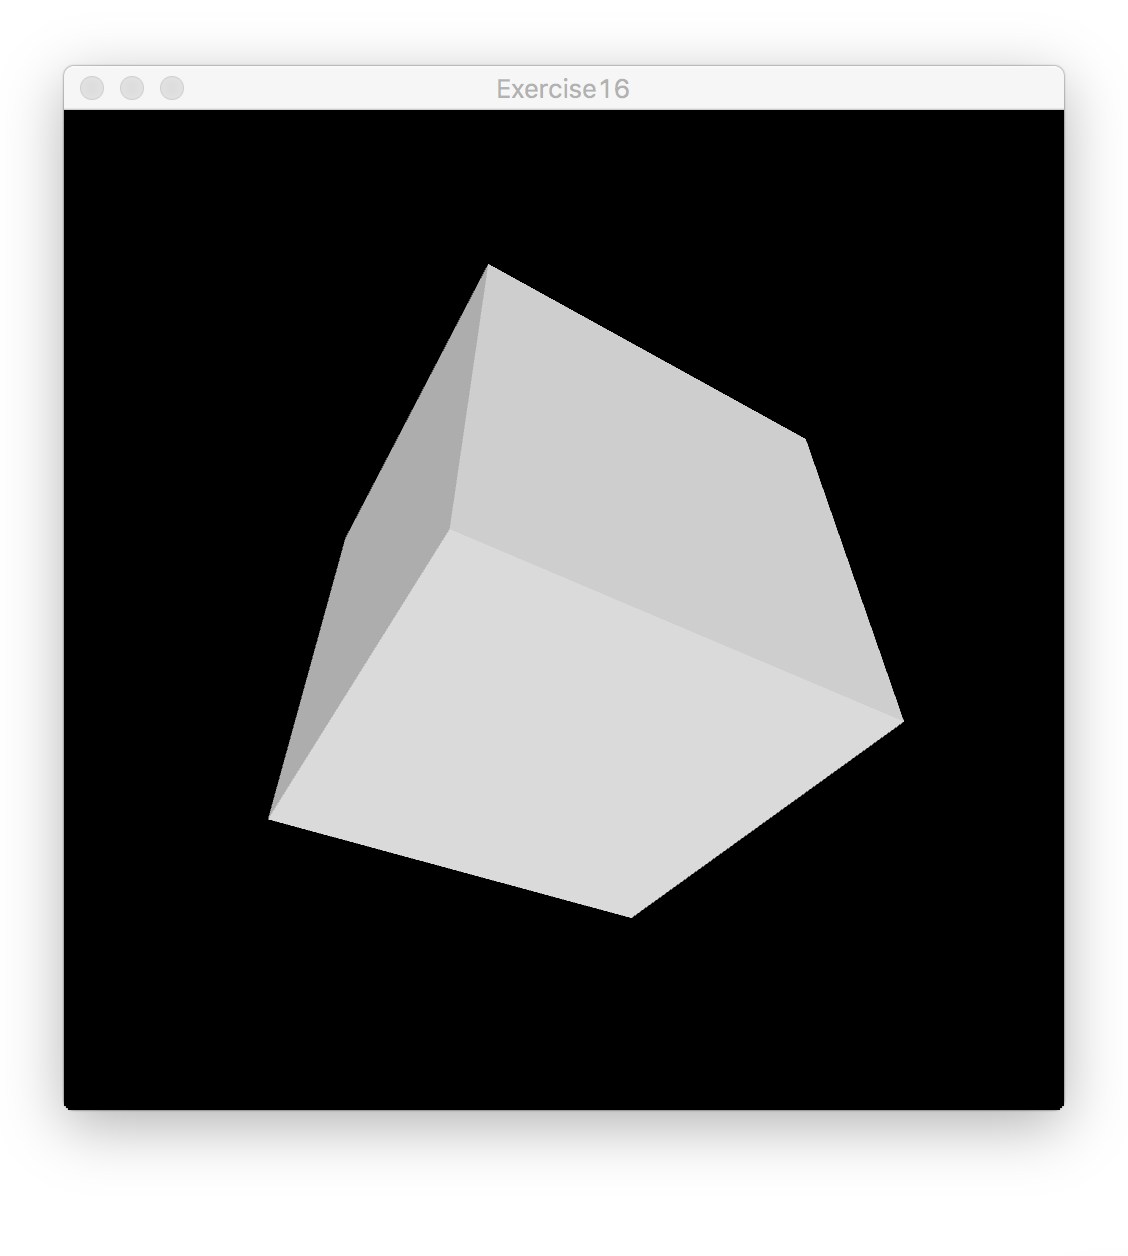
it will look like this, though obviously this says nothing about the interaction:
Now it is possible to rotate by dragging the mouse with the left button pressed, zoom in and out with the right button, and the middle button (command while you drag on a mac) will pan. Double click will restore the initial view, and shift will lock the rotation to one axis… For more details, and possibilities look at PeasyCam webpage. Every library installed in Processing includes also examples that are added to “File->Examples”.
Dxf output.
Finally we are going to look at how to output dxf data from Processing sketches. This is actually quite easy through the pre-installed Dxf Export library, which will convert all data into line segments and triangular faces in the dxf file. To include it in code one only needs to write:
import processing.dxf.*;
At the beginning of the sketch. It is also possible to use the menu: “Sketch -> Import Library… -> dxf”. Which will have the same effect. For using the dxf library it is necessary to write:
beginRaw(DXF,"thefilename.dxf");
before drawing the geometry to be save (change “thefilename.dxf” for the name of the dxf file wanted ) , and
endRaw();
after all the drawing is done.
For being able to control when to save the dxf file at specific moments, and not every time, one can write a conditional statement, s0 for example the sketch only saves when the “s” key is pressed:
import processing.dxf.*;
import peasy.*;
PeasyCam cam;

boolean drawDxf=false;

void setup(){
  size(200, 200, P3D);
  cam = new PeasyCam(this, 100);
  cam.setSuppressRollRotationMode();
  noStroke();
}

void draw(){
  background(0);
  lights();//turn on the lights!

  if(drawDxf){
    beginRaw(DXF, "output.dxf"); //start recording to the file.
  }

  rotateX(radians(45)); //this is only so the lights look good
  rotateY(radians(30)); //we also check if the transformations are saved...
  box(45);

  if(drawDxf){
    endRaw();//stop recording to the dxf file.
    println("file saved.");
    drawDxf=false; //set it to false (so it does not draw every frame...
  }
}

void keyPressed(){
  if(key == 's'){
    drawDxf=true;
  }
}
This will save a dxf file called “output.dxf” in the sketch folder, containing a box made of triangles.
Saving images.
Some useful functions to save the screen from Processing are save() and saveFrame(). one can easily save everything drawn in either TIFF (.tif), TARGA (.tga), JPEG (.jpg), or PNG (.png) formats.


